MYOKB: Baby Cardigan in (slow) Progress

Front Half of Baby Cardigan in Progress

And here you have the first half of the front of the “Baby Cardigan” from p. 38 of Debbie Bliss’s A Knitter’s Year. And it’s taken me almost all week to complete. And this is only one-third of the final project… Yikes.

On the plus side — this is going to be GORGEOUS when it’s finished. This bright raspberry color (Debbie Bliss Baby Cashmerino color #340042, sadly discontinued now) is delicious, and it’s made even more delicious in my eyes by the fact that I got in on mega-sale at Little Knits so this whole project is costing my under $10. It’s also making a dent in my stash.

On the minus side — this project is taking me f-o-r-e-v-e-r. Just how long is Debbie Bliss’s week anyway? Basically, the problem is seed stitch itself. Even though it’s one of my favorite stitches in terms of the final result (and it’s reversible!), it’s a slow stitch to work since you have to move the yarn between the front and back of the needles with every stitch.

Maybe it’s time to investigate quicker ways to work seed stitch.

MYOKB: Clothespin Bag Finished! At very last minute!

Clothespin Bag Finished with Hanger

So, I finished the Clothespin bag at the very last minute last night with some generous help from my talented roommate whose sewing skills vastly out-strip mine. You can see some pictures of the Clothespin bag in its formative stages here and here.

I predicted that I would finish this project with time to spare, but I hadn’t taken into account the time required for finishing. I’m looking forward to the projects coming up since there’s no sewing involved.

The above picture is the completed version with the lining sewn in, the sides crocheted together, and the hanger placed inside. Crocheting the knitted edges together went quite quickly and, in my humble opinion, actually looks better than sewing the edges together on the machine. I also worked a single crochet stitch along the curved edges of the “envelope” (as Debbie Bliss describes it), which I think will give the edges a bit more strength.

With the hanger, I resorted to good old-fashioned elbow grease and a sharp aluminum knitting needle which I used to open up a hole in the fabric and force the hanger hook through. Bliss was (not atypically) maddeningly vague on how exactly to do this part of the finishing.

Sadly, since I live in an apartment, and have no backyard, I don’t have a clothesline from which to hang my new bag. I’ve decided to use it to hold my vast collection of plastic grocery bags awaiting recycling — not a very glamorous use for beautiful handmade bag, but it will look pretty hanging in my utility closet and maybe that will make recycling a happier chore.

MYOKB: Clothespin Bag nears the finish line!

hespin Bag Almost Finished
Clothespin Bag with lining pinned to knitting

At last the knitting is finished, and the finishing begins!

The original pattern calls for the knitted part to be machine-sewn together when the lining is attached, but machine-sewing the lining to the knitted piece and then crocheting the knitted sides together seemed so much easier. Crocheting is so much easier and faster, and allows me to really control the seaming. The navy blue cotton tie you see at the top of the fold marks the center where the hook of the hanger will go through.

My friend Deborah, who is something of an expert seamstress, helped me with the lining and the machine sewing. I must admit, sewing machines still intimidate me a little bit. The fabric is some old calico-style print I bought on sale years ago — so long ago, in fact, that I can’t remember where or when. It matches well with the sage color of the yarn though.

Clothespin Bag Fabric Lining Close-up
Close-up of the fabric lining of the Clothespin Bag

Here’s the bag folded into the proper shape (note the fancy camera angle I learned in my recent “how to photograph knitting” class at Wildfiber in Santa Monica):

Clothspin Bag Almost Finished
Clothespin Bag, folded into proper shape, photographed at a rakish angle

And here’s the same bag photograph straight-on (as I would have done it before I took this class):

Clothspin Bag Almost Finished
Clothespin Bag, folded into proper shape, photographed straight-on

As soon as the lining is sewn on, I can begin using single crochet (size H hook) to bind the sides together. I have chosen a short, padded wooden hanger to hang the Clothespin Bag from. It should look quite sweet when done.

MYOKB: Clothespin bag in progress

Clothespin Bag in progress

Happy Valentine’s Day everyone!

Here we have the “Clothespin Bag” in progress, from p. 48 of Debbie Bliss’s book The Knitter’s Year. The yarn I’ve chosen is Knit One Crochet Too Cotonade, color 832, “light moss.” It’s a sturdy, worsted-weight 100% cotton with a second, much thinner cotton thread intertwined with the main strand; this intertwining creates a kind of nubby “zig zag” effect that looks great with a simply textured stitch like this one.

By the way — just between you, me and the lamppost — Cotonade is exactly the same yarn as Cascade Luna and Suss Cotton. The latter is absolutely interchangeable with Cotonade; they even use some of the same color names. Off the record, on the QT, and very hush-hush…

The knitted pattern basically alternates between one row of seed stitch and one row of stockinette, so this is great, mindless zen knitting. There’s some minor shaping at the beginning and end of the piece to create the concave edges.

And here’s a close-up:

Clothespin Bag in progress, Close-up

I’m making great progress and I expect to have this one done with time to spare.

MYOKB, Week One: “Booties Trio” Finished!

Booties Trio
My attempt at an “artistic” display of baby booties. I just love these little metal chairs from IKEA!

Again, at the very last minute, I have completed the “Booties Trio,” my first project in my series taken from Debbie Bliss’s A Knitter’s Year–“My Year of Knitting Blissfully” (from here on, referred to as MYOKB).

At first, I couldn’t decide if I was only “required” to do one pair of booties, or if I had to knit all three. Then I realized — duh! — I didn’t “have to” do anything. Like the line in Chariots of Fire says: “We are the committee.” In other words, I am in charge of deciding what counts, so I decided to go for it. And now that we’ve all got that theme song running through our heads…

Now to get these in the mail on the way to my sister-in-law who is expecting a little girl practically any day now. I’d personally like her to arrive on February 29th so she can be a leap-year baby, but my SIL is in the “dog days” of pregnancy and I think she’d like the baby to come as soon as possible. Either way, this will be one of the best-shod babies around town.

MYOKB: Booties Trio in Progress

The Knitter's Year Cover
Cover of Debbie Bliss’s The Knitter’s Year

Here’s my progress so far on the “Booties with Lacy Top” from the “Booties Trio” from Debbie Bliss’s The Knitter’s Year. This is my first project from my year-long project to knit all 52 projects in that book, a project otherwise known as “My Year of Knitting Blissfully” or “MYOKB” for short.

These are going to be a gift for my new niece who is expected to make her appearance at the end of this month. Personally, I’m hoping she’s born on February 29th so she will be a leap year baby. I’m just weird that way.

Basically, I’ve completed all the actual knitting (except for a small bit on the second “Bootie with Lacy Top”) and now I have to weave in all the ends and do the seaming and finishing:

Booties with Lacy Top
Booties with Lacy Top, in progress
Booties with Striped Instep
Booties with Striped Instep, in progress, cuff unfolded

And here are both of them, still unseamed, but with the cuffs folded down:

Booties with Striped Instep 002
Booties with Striped Instep, cuffs folded

And the final entry in the trio, “Booties with Striped Foot”:

Booties with Striped Foot
Booties with Striped Foot, in progress

Have I mentioned lately how much I hate seaming? Blurgh. And I have to make some “shoelaces” for the “Lacy Top” booties. Double blurgh.

The dark pink and light green are two different (discontinued) colors of Debbie Bliss Baby Cashmerino (340042 and 340018 respectively), and the white in the “Striped Inset” and “Striped Foot” versions is Karabella Aurora 4. The white in the “Lacy Top” version is Suss Love in ivory.

Valentine’s Day Elf Hat for Ella

Pointy Elf Hat
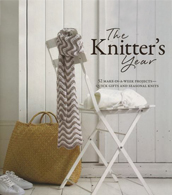
Sometimes the titles of books can be misleading, especially when they make promises like “these are the kinds of patterns you can make as last-minute gifts.” Yeah, right, I thought, as I eagerly plunked down money for Joelle Hoverson’s beautifully produced Last-Minute Knitted Gifts and then again for its equally gorgeous More Last-Minute Knitted Gifts. Even though I felt an irresistible urge to own both books, I must admit I was skeptical about their titles’ promises: “You don’t know how last-minute I can get!” I dared them silently.

However, this is the fourth project I’ve completed from the two books and so far they more than live up to their promise. When the pattern says it’ll take 2-4 hours, it takes 2-4 hours. I started yesterday afternoon and I was finished by evening. The other project I’ve done is the “Soft as a Cloud Cowl” (twice) from the second book and the “Airy Scarf” by Brenda Overstrom from the first. Muddy picture of said scarf below:

Airy Scarf by Brenda OverstromThis most recent project, “Pointy Elf Hat,” was a snap. I knitted it with size 13 needles in Lion Brand Wool Ease Thick and Quick (my “go to” bulky yarn) in “blossom” and the heart was crocheted with a size I hook and one strand of Suss Coolaid (discontinued) and one strand of perle cotton. I found the heart pattern (free!) on Ravelry, of course. It’s from Kara Gunza’s blog “Petals to Picots” and it’s called “Valentine’s Day Heart Crochet Pattern.”

When I look at this hat, I’m reminded of Stephen Colbert’s running joke about George W. Bush: “Great president? Or, the greatest president?” Is this an adorable hat? Or, the most adorable hat?” It will, of course, look even more adorable (if that’s possible) on the world’s cutest niece, Ella.

This is the other hat I sent in my Valentine’s Day package:

Jester Hat for EllaI finished this years ago (2004?) and I guess I was just waiting for the perfect little girl to give it to. Soon she’ll have a little sister to share her hat with — or maybe Auntie Kate will have to make another one? The pattern is “Tri-Corner Hat” by Cathy Campbell for Crystal Palace. Happy Valentine’s Day to all!

Purl Dreams Finish!

Purl Dreams FinishedI bought this pattern at my LYS–Unwind–just a couple weeks ago and I had to start it right away, even though I don’t really have any plans for it. I just love the idea of creating a square blanket in plain ol’ stockinette.

This blanket is an example of my favorite kind of project: it’s (relatively) easy to knit and yet the finished product looks elegant and complicated. It was perhaps a little tricky at the beginning to juggle the dpn’s and get into the “swing” of the pattern, but once you get going, it’s quite easy. This is a perfect “sit in front of the TV” project.

This is “Purl Dreams” in a slightly less complete state:

Purl Dreams WIP

The only difficulty I had was deciding how to join one skein to the next. Since the piece is seamless and knitted as one piece in the round (or, I guess, technically, in the square), there are no edges or seams to hide the loose ends in. I used a variation of the “Russian Join” so the joins would be very secure and stand up to all the wear and tear it’s bound to be subjected to by an active toddler. My final photos were taken pre-blocking, but it’s still difficult to tell (especially on the front side) where one skein ends and the other begins.

Although the pattern called for ivory, I chose a pretty mauve/pink with a chocolate brown border because those are such popular colors right now for girls. I would gladly do this pattern again, however I would probably arrange to do all my joins in the diagonal furrows of the yarn-over increases. I think that would hide them better and probably create a smoother final product.

Overall, though, I think this is adorable and I can’t wait to do more patterns like this square shape–next time with stripes?

A Finish!: “Absorba the Great Bathmat”

I am Absorba, the Great Bathmat!
I am Absorba, the Great Bathmat! Bow before my moisture-extracting powers!

Although this is my first project from the first Mason-Dixon Knitting book, I have been head over heels in love with their aesthetic ever since it came out. Their second book, Mason Dixon Knitting Outside the Lines, only reinforced my eternal love and devotion.

Obviously, the knitted log cabin quilt pattern is one of their trademarks and although I am far from the first to jump on this bandwagon, I am definitely one of the most enthusiastic. In fact, I realize I’m probably the last blogger in the Western Hemisphere to extol the virtues of log cabin knitting, but here goes… It’s very soothing to work solely in garter stitch. It’s almost mindless (and I mean that in the best possible way) and kind of zen. And the way the log cabin pattern works, there’s hardly any counting of rows or stitches involved. Not to mention the fact that the design possibilities–color, texture, fiber mixtures, striping, size, shape, fancy/everyday–are endless.

On a personal note, my grandmother was an avid quilter who loved to make log cabin quilts for everyone in the family. Although I have not inherited her quilting skills (or patience), I like to think that log cabin knitting keeps alive the tradition she loved so much.

For this project, I used size 15 needles and four strands of either Lily Sugar & Cream and Suss Bomull in ivory, chocolate and olive. The two yarns are, IMHO, completely interchangeable. The olive and chocolate bands (which are a little hard to see in this photo) match the colors in my bathroom decor (and I use the term “decor” loosely). You’ll have to trust me that those colors work. Really.

Two Sweaters for Niece-to-be

Cabled Raglan Sweater FinishedI’ve just finished the “Cabled Raglan Baby Sweater” by Rebecca L. Daniels, a gift for the niece-to-be (the first photo is here). Because there are no seams — it’s worked from the neck downwards — it’s quite easy to finish. I had to make a quick trip to the local sewing store to get a snap since the button is only decorative. I chose a plastic, translucent white button to match the button from the baby kimono I also made for the niece to be. The yarn I used to make this, the heather Suss Love, is the same yarn I used to crochet the edges of the Kristin Spurkland “Baby Kimono.” Even though the sweaters are very different in appearance, I think the use of same yarn ties the two sweaters together and makes them a kind of matching set. Here’s a close-up of the crochet edging and buttons:

Ella's Kimono Close-up

And here’s a close-up of the button and collar area of the “Cabled Raglan Baby Sweater”:

Cabled Raglan Sweater Collar Close-upI chose to work the collar and buttonhole band edging in seed stitch instead of garter stitch which is what the pattern calls for. No particular reason–I just like the look of seed stitch better.

Update 07/05/15: I’ve been informed that the link to the free pattern for the “Cabled Raglan Baby Sweater” doesn’t work anymore and I’ve searched all over Ravelry and the Interweave Knits sites and couldn’t find a copy. Click here for a pdf copy of “7 Free Baby Knitting Patterns from Interweave Knits” that includes this pattern.