Christmas Crescent

Wouldn’t you know it? As soon as I vow to restart this blog, I get sick as a dog (hey, that rhymes!). I hope you’ll forgive me for taking so long to post again.

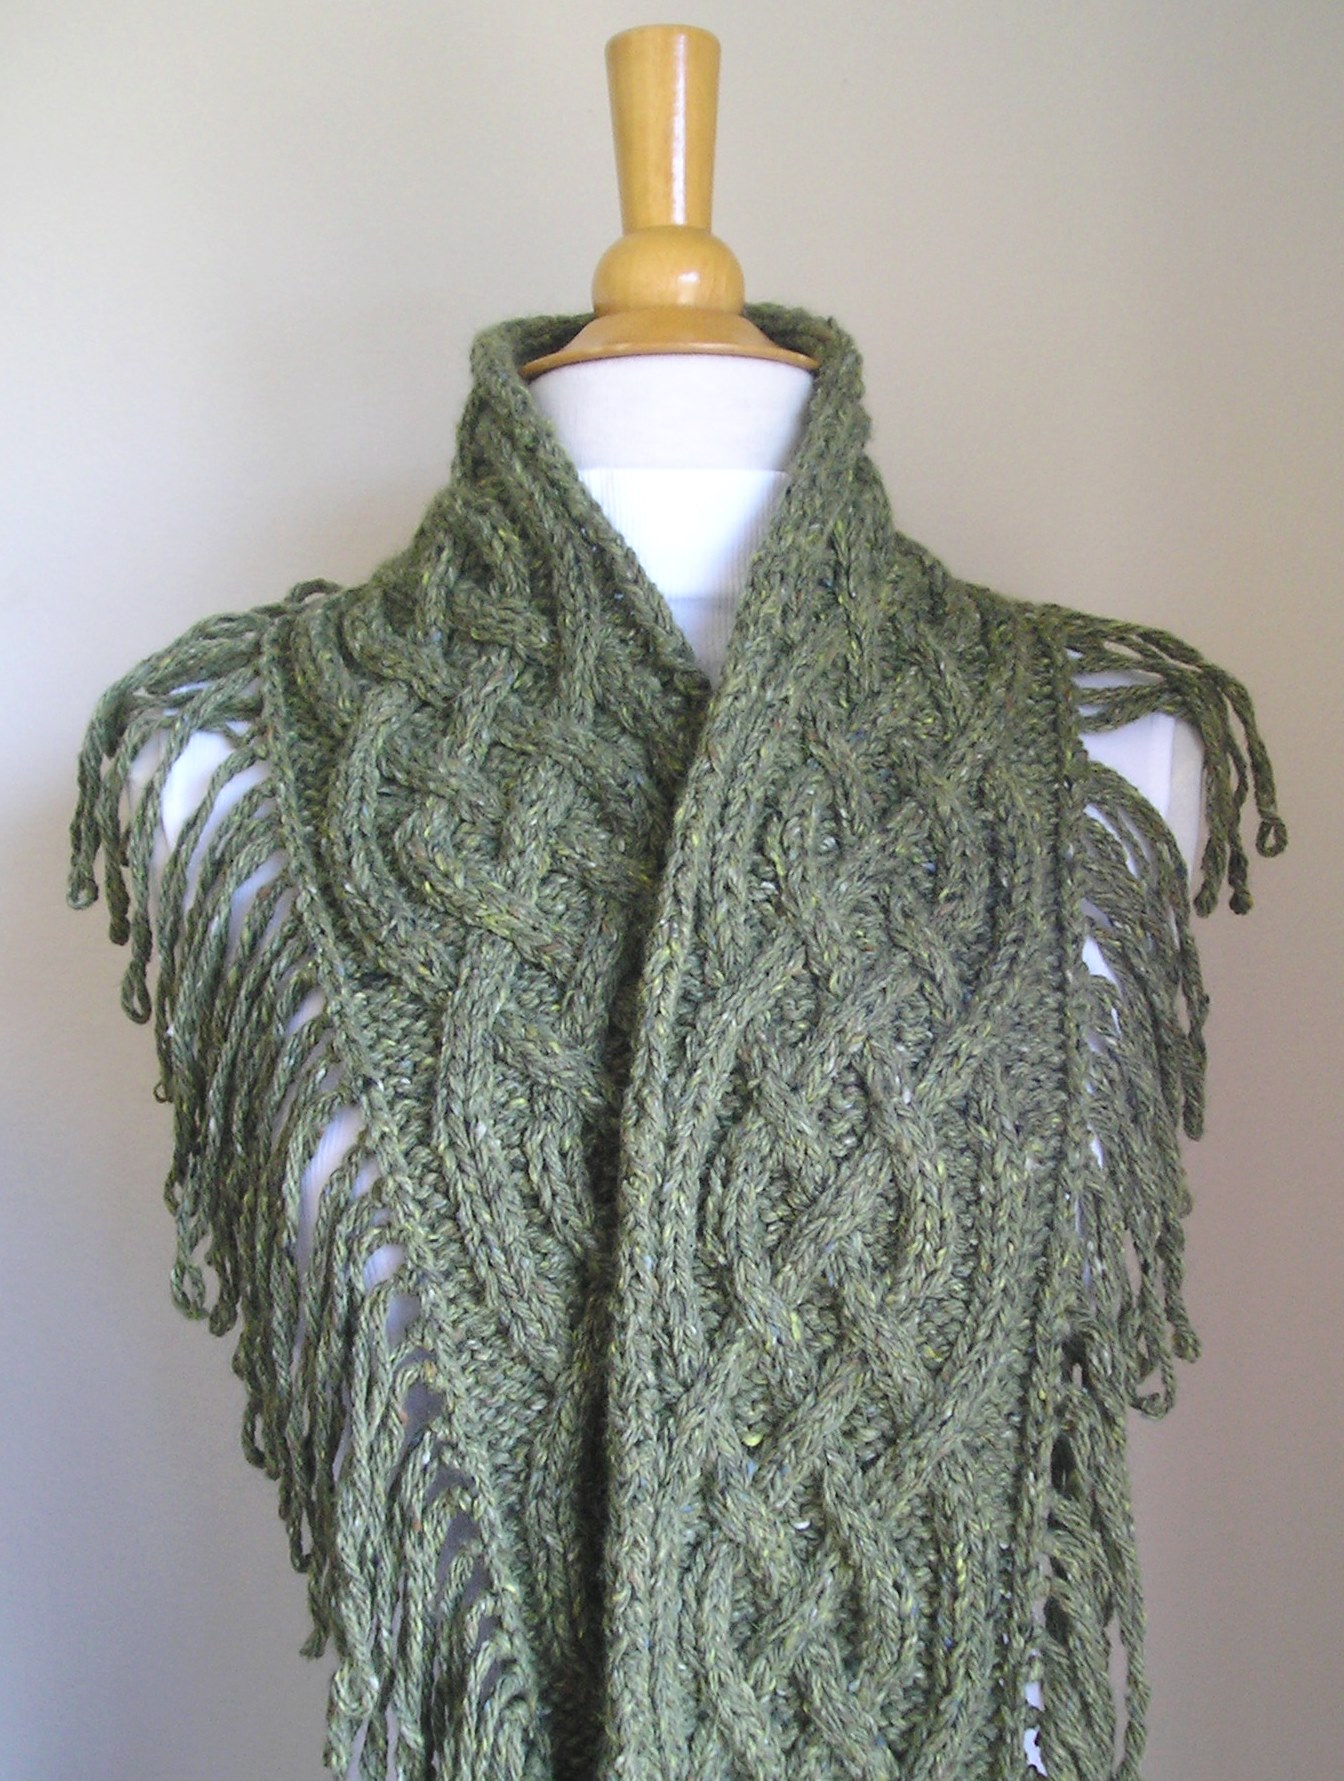
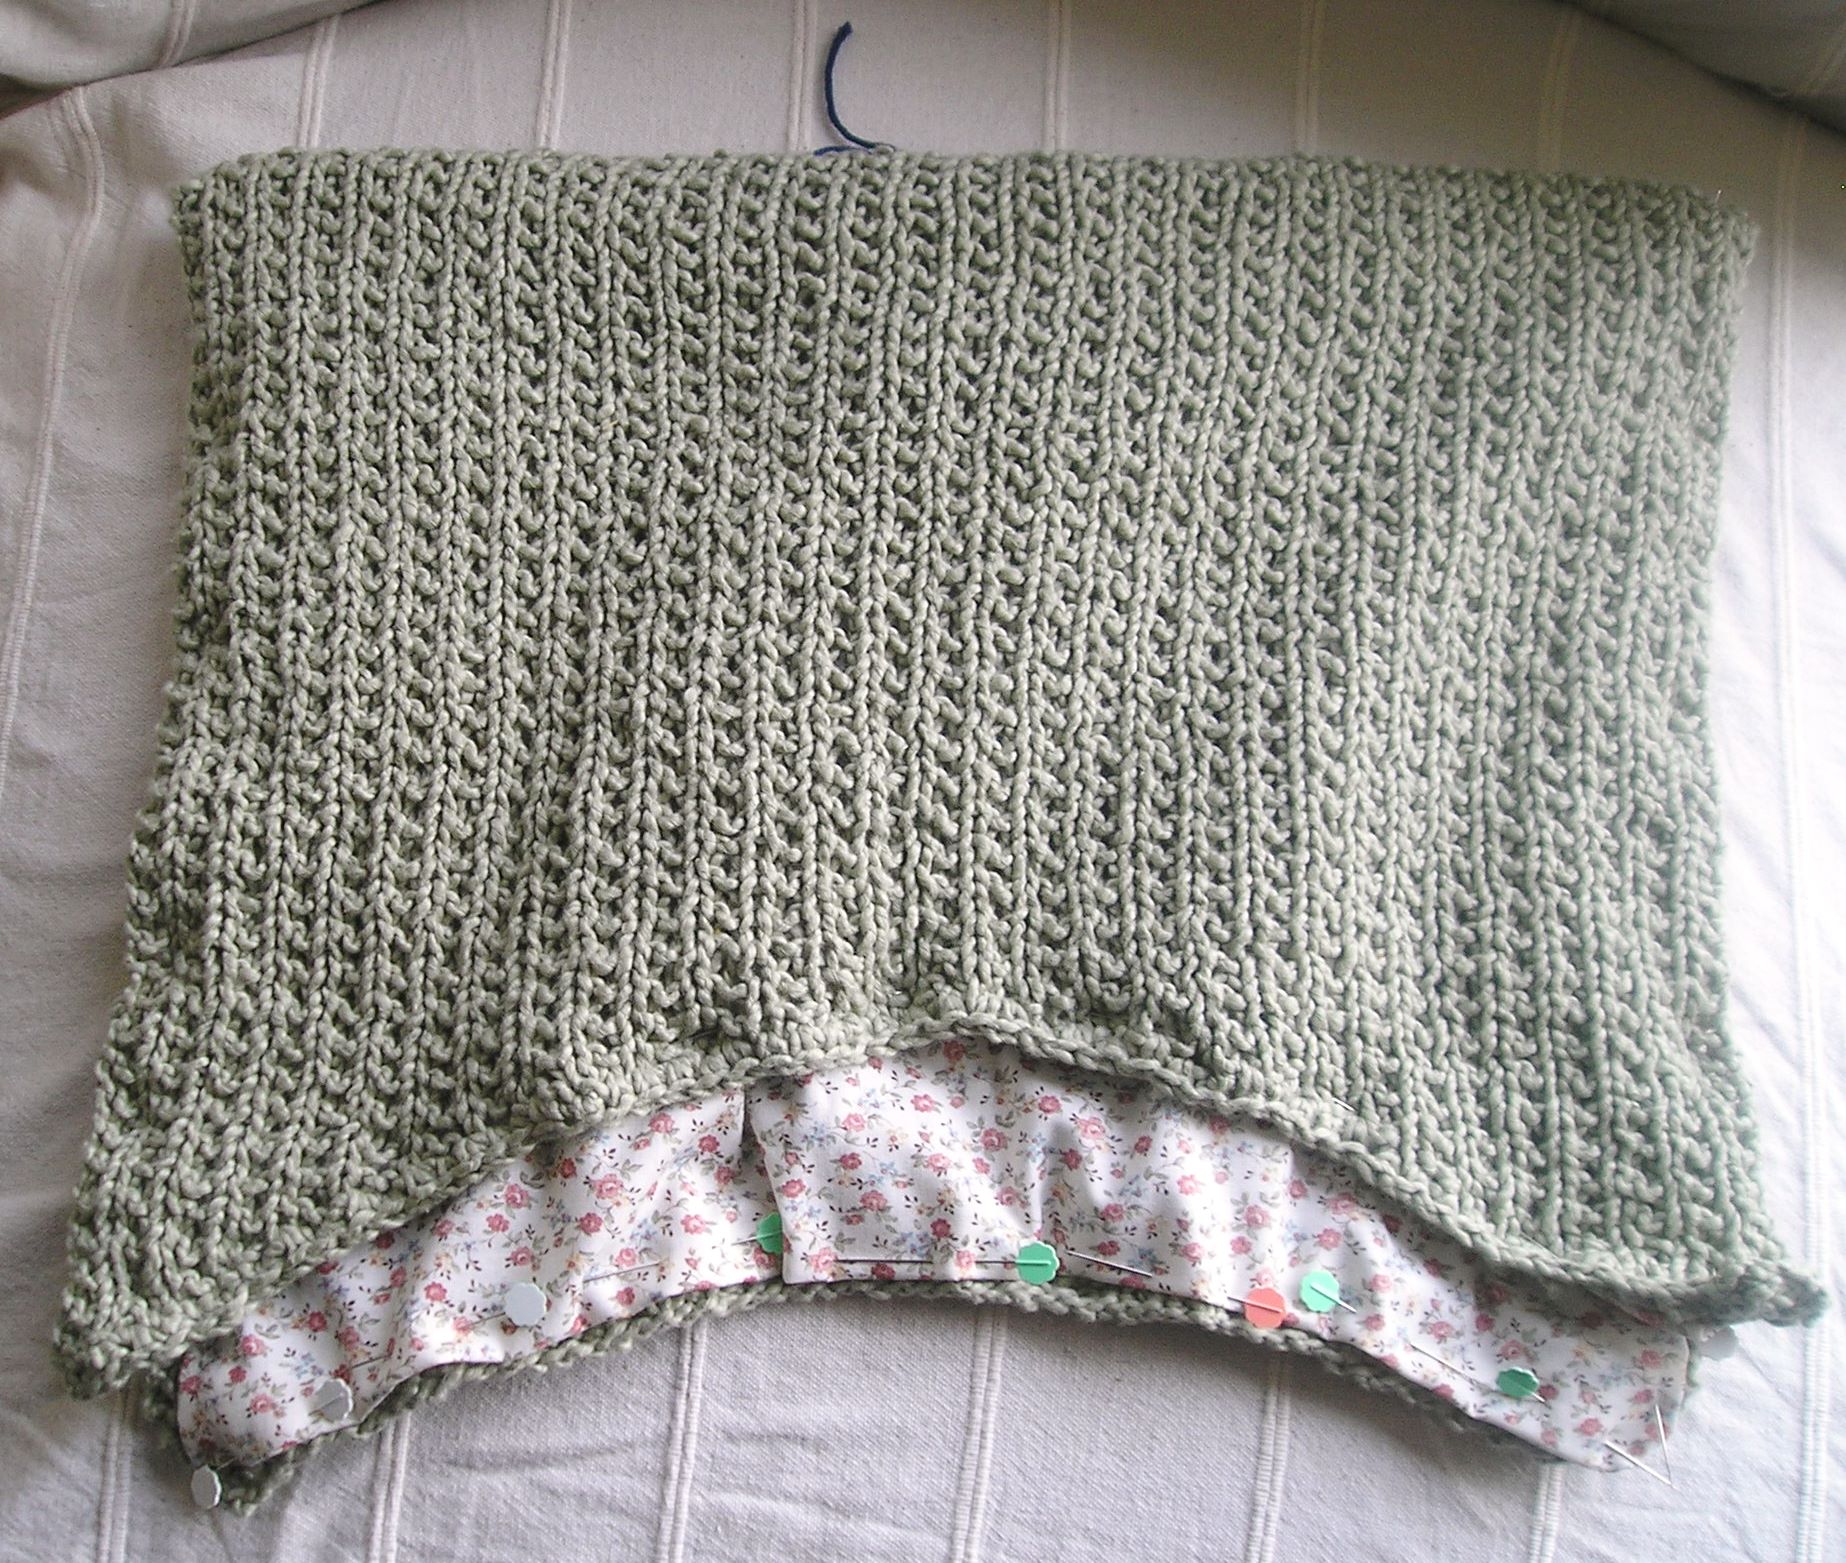
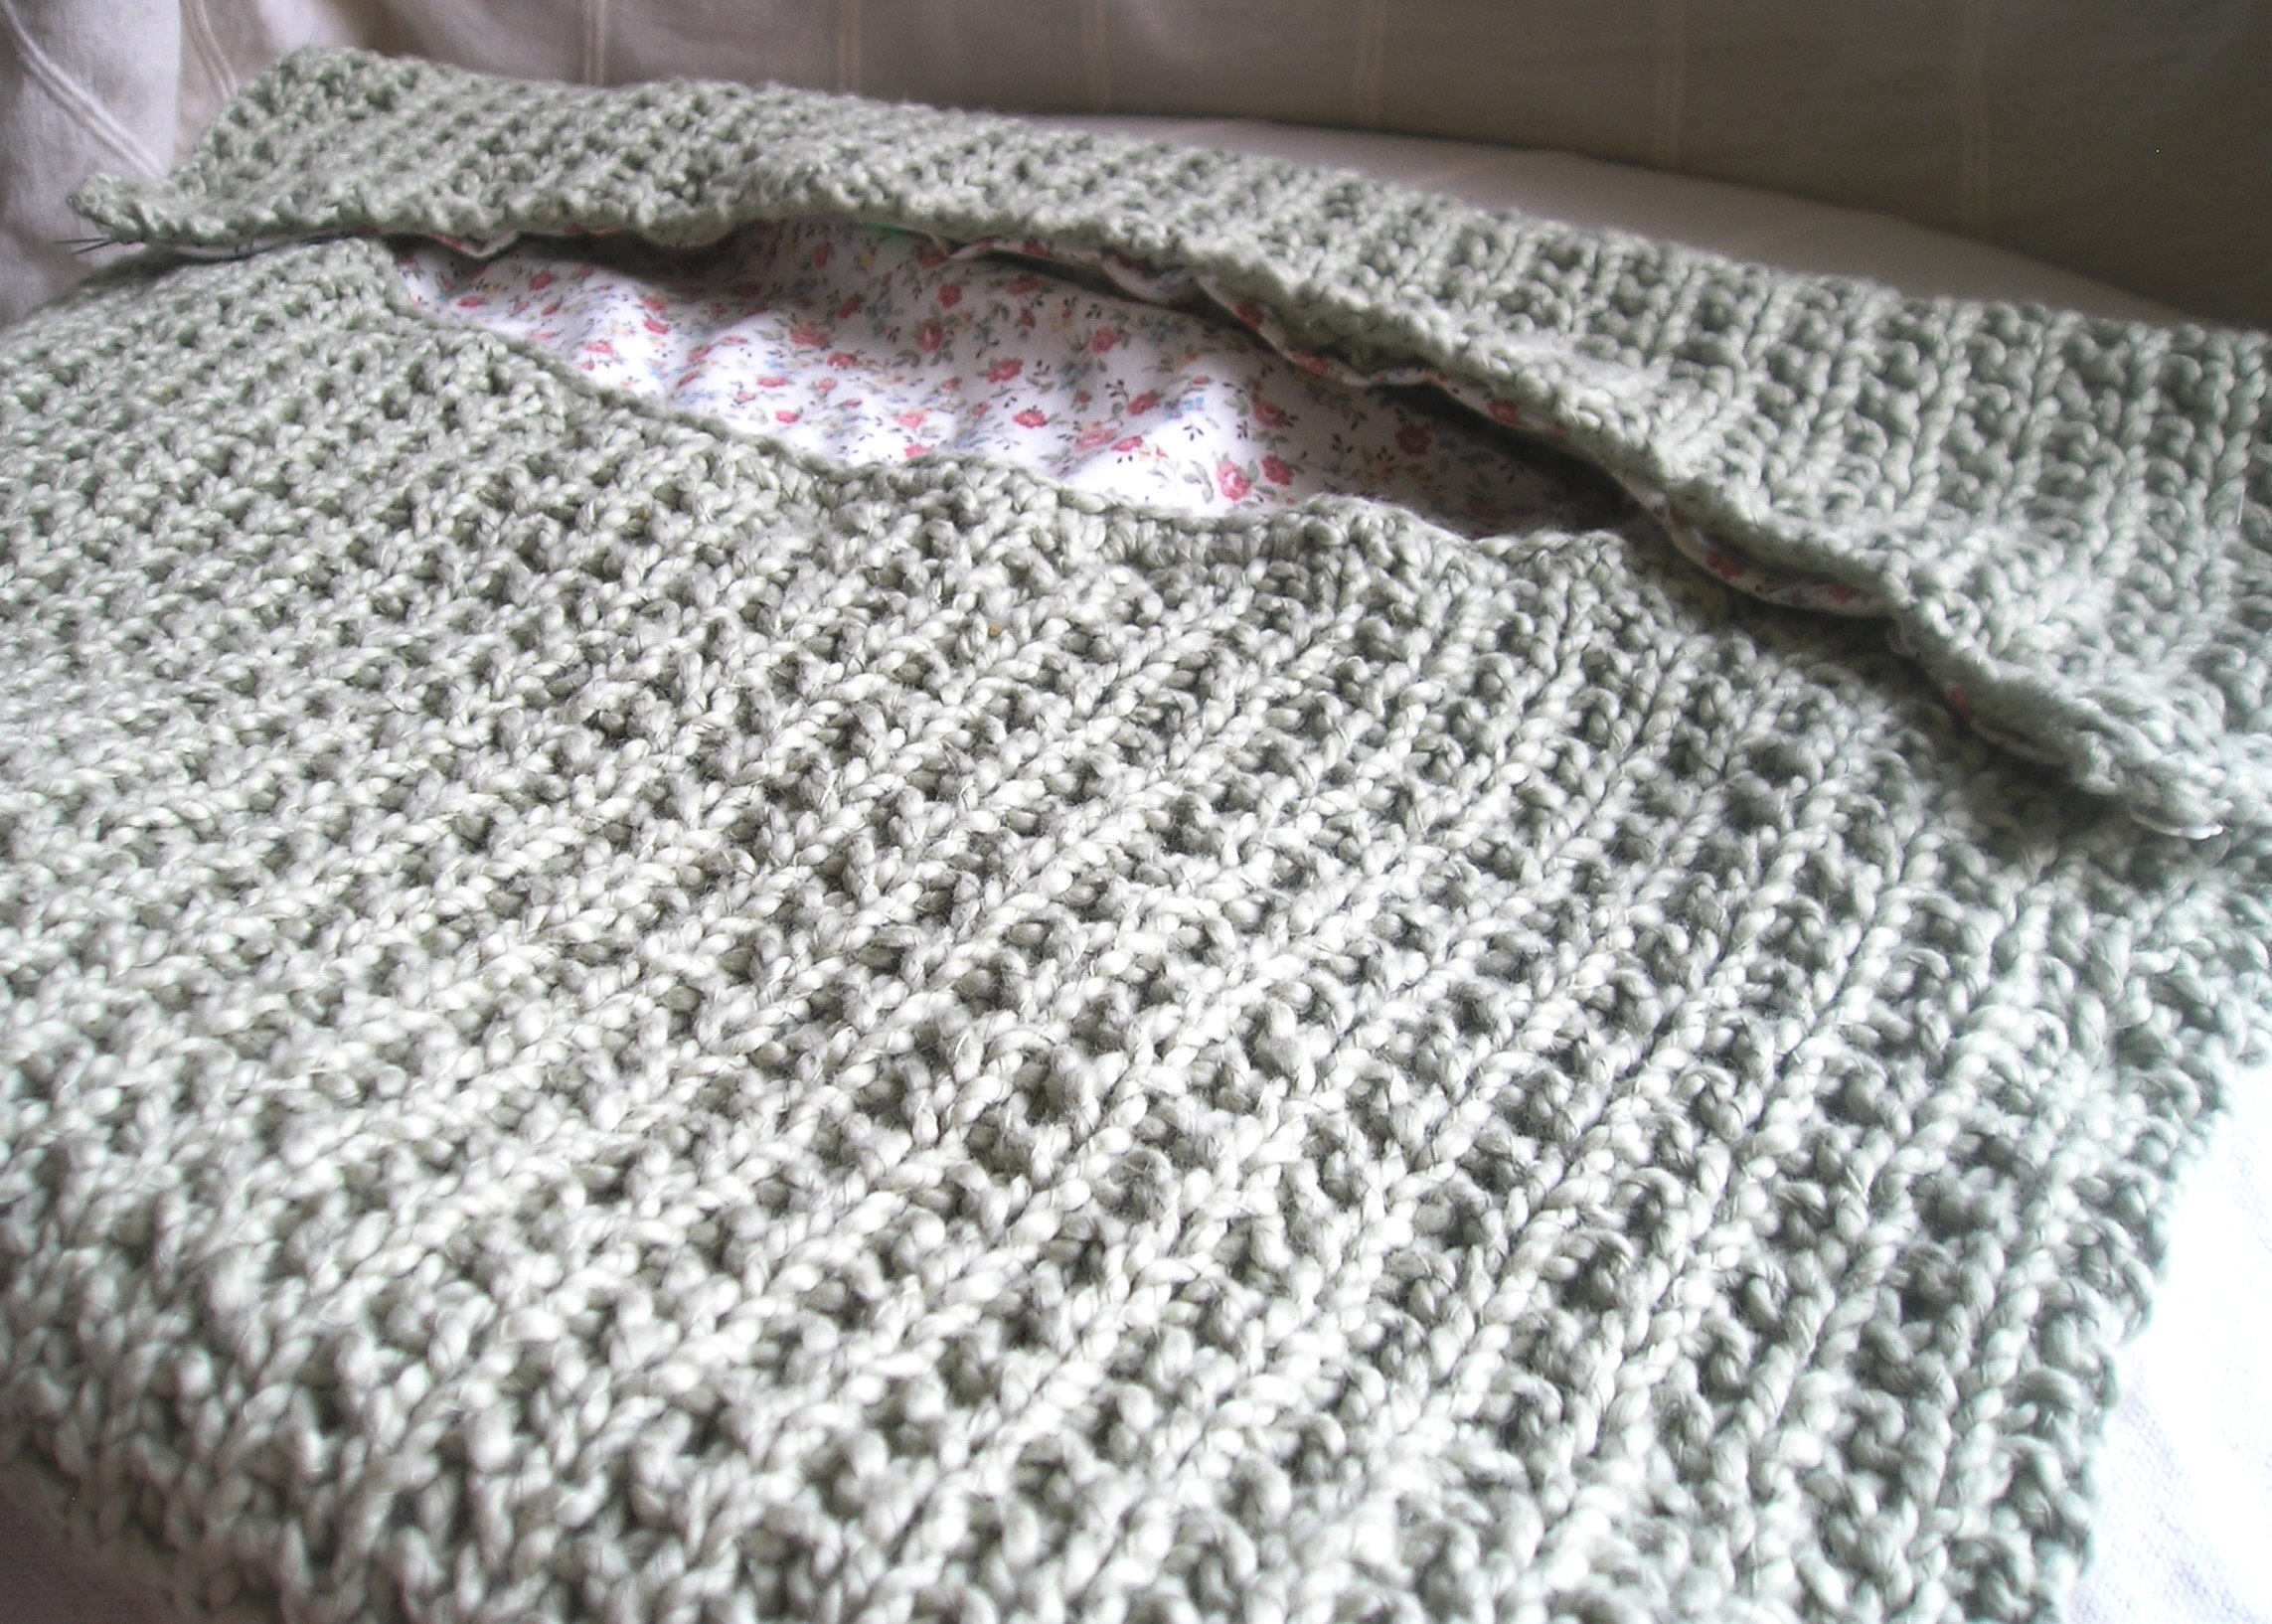
I thought I’d start with a little bit of a look back at the Christmas presents I made for 2013. Unfortunately, I had a mishap with my camera, so I only have two projects that survived the unintentional camera purge. Very frustrating. Fortunately, I do have some gorgeous pictures of the Ginkgo Crescent shawl by Jade Keaney that I knitted for my talented Aunt Kathy. Here’s the (hugely oversized) gallery of pictures:

In my family, we draw names for Christmas presents and we each get one present from/for another family member. This year, I was given the name of my Aunt Kathy, who is herself a knitter so I know she appreciates finely dyed wool and an intricately blocked pattern.

Our family gathered together in November for a wedding and Kathy looked beautiful in a beautiful dark teal green dress. I was already itching to make the Ginkgo Crescent for someone special so I went online to find the perfect shade of MadelineTosh Light Merino to match Kathy’s dress. It’s called “Cousteau” (after Jacques Cousteau perhaps?) and the pictures don’t begin to do it justice. Gorgeous, amazing, sublime colors. This is my first time knitting with MadelineTosh yarn and I’m already addicted. And the yardage is quite generous; I added two repeats of the stockinette stitch portion and the entire shawl still took less than one skein.

I have learned a couple things making this shawl. First, I need to work on my crescent-shaping technique so there isn’t too much of a “bump” in the center of the shawl where the cast-on edge is. And second, make sure you have vinegar on hand to wash the Merino Light and ensure colorfastness. During the blocking process, the color bleeding was extensive, like I had murdered a Vulcan with a chainsaw (yo, where my Trekkies at?).

Well, I’ve regaled you enough for today. I will save tales of my second Christmas present for tomorrow.


I’m back, baby!

The lyf so short, the craft so long to lerne...
“Stickley Gold Lyf So Short Motto Painting” from Ford Craftsman Studios

Happy New Year! So, after a long hiatus, this blog is officially up and running again! 

I could offer a ton of excuses–busy at my “job,” switching from Typepad to WordPress was more hellish than expected, losing sight of the purpose of having a blog in the first place, a bad case of kittens, thinking my life was headed in a different direction,  voodoo curse, recovering from the shock of the Red Wedding (yeah, I know, it was in the books), entropy, not wanting to admit that I abandoned My Year of Knitting Blissfully, my duties as the Slayer…  And all of these have a grain of truth to them (some more than others), but the real truth is probably a combination of all of the above (again, some more than others). I’ve thought many times of restarting this blog over the past year-and-a-half, but there always seemed to be a reason to wait. Or, more accurately, there always seemed to be a reason to avoid having to write this very post, the one where I admit I really didn’t have a good reason to stop in the first place.

But I’ve been trying to adopt a new motto lately: don’t let perfect be the enemy of good. In other words, don’t let some vision of what you could achieve if everything goes perfectly get in the way of doing what is actually a good job. Instead of thinking I needed to perfect my old blog, I just needed to start anew and leave the odd, unconnected remnants of the old blog in peace. We all need a fresh start sometimes. After all, as the song says, “Every new beginning comes from some other beginning’s end.”

Over the next few days, I will be filling you in with all my new crafting plans for 2014, but, until then, please enjoy this lovely photo of some beautiful yarn.

Super Bowl Sale Haul
Haul from Super Bowl Sale at Unwind last year

Appetizer Links

My Latest Finish: "Saxon Braid Scarf" by Nicky Epstein
My Latest Finish: “Saxon Braid Scarf” by Nicky Epstein

I’m working hard on getting this blog up and running for real by New Year’s Day 2014, so I’ve been collecting links to various knitting- and needlework-related stories out there in the webverse.

Here are some stories to tease your appetite before I relaunch the blog on January 1st:

MYOKB: “Lacy Scarf” Finished!

"Lacy Scarf" Finished!
“Lacy Scarf” Finished!

I don’t have any “in progress” photos this week, but I have (somehow) managed to finish this week’s project, “Lacy Scarf” (page 62 of Debbie Bliss’s The Knitter’s Year), from My Year of Knitting Blissfully (MYOKB).

Although it came out quite well, in my humble opinion, I must admit that this was not my favorite project to work. In part, this was due to the repetitive nature of the pattern (the same four rows over and over again), but this was mostly due to interference from my new kitten, Tuppence, who decided to make this scarf her personal plaything. She chewed the heck out of my nice size 5 bamboo circulars, causing the yarn to snag repeatedly until I could find time to replace them. She also attacked the two balls of Classic Elite Silky Alpaca Lace (colors 2416, off-white, and 2420, aqua blue) I was knitting with.

Since I was using two strands of the Silky Alpaca Lace, I was using the “trick” of pulling one strand from the center of the skein and one from the outer edge.  I also trailed the alternating colors of yarn up the side and intertwined the resting yarn with the working yarn to “hook” it into place. All of this twisting of multiple strands of yarn, combined with kitten shenanigans, led to a very frustrating knitting experience.

"Lacy Scarf" Close-up
“Lacy Scarf” Close-up

And just how long is Debbie Bliss’s week anyway? I mean, I know she runs a worldwide knitting empire, but seriously, this scarf took awhile to knit (even taking into account the problems I mentioned above).

The pattern calls for working half the scarf in one direction, placing it on a stitch holder, and then working another half of the scarf and grafting the two halves together. Instead, I worked the entire scarf in one piece and one direction. This caused the two ends to look slightly different from each other, but I’m OK with that. You can judge for yourself from the photo at the top of this post.

All that said, the resulting scarf is quite nice and the chevron effect is beautiful.

MYOKB: “Striped Baby Hat” Finished!

Debbie Bliss "Striped Baby Hat" Finished
Debbie Bliss “Striped Baby Hat” Finished

After last week’s endless seed stitch adventure, this week’s foray into My Year of Knitting Blissfully (MYOKB) has been a piece of cake. Easy peasy, lemon squeezy, as they say.

This week’s project (finished in one evening, as predicted) is the “Striped Baby Hat” on page 68, which I worked using GGH Goa in white and Suss Snuggle in a lovely shade of French blue. Although the labels describe these yarns as having slightly different fiber contents (slightly different percentages of cotton and acrylic), I strongly suspect, actually, that these two yarns are identical to each other and are just marketed under different names and brands. This is a common practice in the yarn world. Anyway, they worked together swimmingly and the gauge match was perfect. Gauge isn’t super-important with a project like this one, of course. My philosophy is that, eventually, the baby’s head will fit the hat.

"Striped Baby Hat" with seam and jogless jog showing, sort of
“Striped Baby Hat” with seam and jogless jog showing, sort of

I’ve made many baby hats similar to this one in the past, so the only real trick I remastered was the “jogless jog,” a technique to help you avoid unsightly “hitches in your stitches” (which is waaaay better than hitches in your britches, trust me) when you work stripes in the round. Basically the technique involves knitting the first round of any new color change as usual, and then knitting the first stitch of the previous round together with the first stitch of the second round. You can see it more eloquently described by the inimitable Meg Swanson here.

And you can (kind of) see the “jogless jog” in action if you look at the right side of this second picture of the “Striped Baby Hat” ; follow the seam up from the little “bump” in the bottom hem on the far right. Apologies for not taking a better picture.

MYOKB: Baby Cardigan Finished!

Baby Cardigan finished!

A three-needle bind-off here. A chocolate grosgrain ribbon there. A little seaming. And the Baby Cardigan is finished at last! Phew! It looks beautiful and since my little niece, Lauren Amelia, was born the week before last, I’m glad that I will have an even more beautiful baby to give it to.

This bright fuchsia pink is not my usual color choice, but when I imagined this cardigan, the only ribbon choice I could envision was chocolate grosgrain (1/4″ wide). If I was one of those people who got paid to think of names for color combinations, I would call this one “Raspberry Truffle.”

"Baby Cardigan," Close up with Chocolate Grosgrain Ribbon
“Baby Cardigan,” Close up with Chocolate Grosgrain Ribbon

Since this project took me so long to finish, I’m glad that this week’s is a simple baby hat. I can probably knock that out in one night.

"Baby Cardigan" finished, with ribbon, and photographed at a rakish angle
“Baby Cardigan” finished, with ribbon, and photographed at a rakish angle

MYOKB: Baby Cardigan in (slightly faster) Progress

Debbie Bliss "Baby Cardigan," Back, Rakish Angle
Debbie Bliss “Baby Cardigan,” Back, Rakish Angle

After what seemed like several weeks but was only actually a few days, I’ve finished the back of the “Baby Cardigan.” As I’ve mentioned before, I love, love, love the look of seed stitch, but it takes me so long to work. I figure that this pattern would have taken me half as long to make if it were done in stockinette or garter stitch.

To help speed the process along, and in keeping with my goal of trying to expand my repertoire of knitting techniques throughout My Year of Knitting Blissfully, I researched some supposedly faster ways of working seed stitch. I knit in a style I laughingly call “modified-throw Continental” — in other words, I do hold the yarn in my left hand but I don’t use the right-hand needle to “pick” at the yarn, like most Continental knitters do, but instead I kind of “throw” the yarn over the needle, like most English-style knitters do. There’s no wrong way to knit, right? Just ask the divine Annie Modesitt.

The interwebs were all agog about the “Norwegian purl” which supposedly makes it faster for continental-style knitters to work “K1 P1” stitches like ribs and seed stitch. The advantage of this technique is that the yarn is always held at the back of the needles so there’s no need to move the yarn from the front to the back (and back again) after every stitch.

After viewing several videos and tutorials online, I tried several times to make the “Norwegian purl” work with my style of knitting, but no luck. Maybe it’s because of the way I knit, or maybe I didn’t give it enough of a chance.

Debbie Bliss "Baby Cardigan" Back, Photographed Straight-on
Debbie Bliss “Baby Cardigan” Back, Photographed Straight-on

There’s no way I will be finished with this project by the end of my allotted week (which ends today). My first missed deadline. Sigh.

MYOKB: Baby Cardigan in (slow) Progress

Front Half of Baby Cardigan in Progress

And here you have the first half of the front of the “Baby Cardigan” from p. 38 of Debbie Bliss’s A Knitter’s Year. And it’s taken me almost all week to complete. And this is only one-third of the final project… Yikes.

On the plus side — this is going to be GORGEOUS when it’s finished. This bright raspberry color (Debbie Bliss Baby Cashmerino color #340042, sadly discontinued now) is delicious, and it’s made even more delicious in my eyes by the fact that I got in on mega-sale at Little Knits so this whole project is costing my under $10. It’s also making a dent in my stash.

On the minus side — this project is taking me f-o-r-e-v-e-r. Just how long is Debbie Bliss’s week anyway? Basically, the problem is seed stitch itself. Even though it’s one of my favorite stitches in terms of the final result (and it’s reversible!), it’s a slow stitch to work since you have to move the yarn between the front and back of the needles with every stitch.

Maybe it’s time to investigate quicker ways to work seed stitch.

MYOKB: Clothespin Bag Finished! At very last minute!

Clothespin Bag Finished with Hanger

So, I finished the Clothespin bag at the very last minute last night with some generous help from my talented roommate whose sewing skills vastly out-strip mine. You can see some pictures of the Clothespin bag in its formative stages here and here.

I predicted that I would finish this project with time to spare, but I hadn’t taken into account the time required for finishing. I’m looking forward to the projects coming up since there’s no sewing involved.

The above picture is the completed version with the lining sewn in, the sides crocheted together, and the hanger placed inside. Crocheting the knitted edges together went quite quickly and, in my humble opinion, actually looks better than sewing the edges together on the machine. I also worked a single crochet stitch along the curved edges of the “envelope” (as Debbie Bliss describes it), which I think will give the edges a bit more strength.

With the hanger, I resorted to good old-fashioned elbow grease and a sharp aluminum knitting needle which I used to open up a hole in the fabric and force the hanger hook through. Bliss was (not atypically) maddeningly vague on how exactly to do this part of the finishing.

Sadly, since I live in an apartment, and have no backyard, I don’t have a clothesline from which to hang my new bag. I’ve decided to use it to hold my vast collection of plastic grocery bags awaiting recycling — not a very glamorous use for beautiful handmade bag, but it will look pretty hanging in my utility closet and maybe that will make recycling a happier chore.

MYOKB: Clothespin Bag nears the finish line!

hespin Bag Almost Finished
Clothespin Bag with lining pinned to knitting

At last the knitting is finished, and the finishing begins!

The original pattern calls for the knitted part to be machine-sewn together when the lining is attached, but machine-sewing the lining to the knitted piece and then crocheting the knitted sides together seemed so much easier. Crocheting is so much easier and faster, and allows me to really control the seaming. The navy blue cotton tie you see at the top of the fold marks the center where the hook of the hanger will go through.

My friend Deborah, who is something of an expert seamstress, helped me with the lining and the machine sewing. I must admit, sewing machines still intimidate me a little bit. The fabric is some old calico-style print I bought on sale years ago — so long ago, in fact, that I can’t remember where or when. It matches well with the sage color of the yarn though.

Clothespin Bag Fabric Lining Close-up
Close-up of the fabric lining of the Clothespin Bag

Here’s the bag folded into the proper shape (note the fancy camera angle I learned in my recent “how to photograph knitting” class at Wildfiber in Santa Monica):

Clothspin Bag Almost Finished
Clothespin Bag, folded into proper shape, photographed at a rakish angle

And here’s the same bag photograph straight-on (as I would have done it before I took this class):

Clothspin Bag Almost Finished
Clothespin Bag, folded into proper shape, photographed straight-on

As soon as the lining is sewn on, I can begin using single crochet (size H hook) to bind the sides together. I have chosen a short, padded wooden hanger to hang the Clothespin Bag from. It should look quite sweet when done.